Post
Brew: Installing packages (example: Mozilla Firefox)
In the first part of this series of articles, I explained how to install the popular package manager brew.
Brew: Package manager for macOS
In the second part of this series of articles, which is turning out to be rather long, we’ll look at how to find and install packages.
brew search
The following steps take place in the terminal, as is the case with almost everything in brew. The terminal will become your new best friend, and you’ll learn to use your computer with it. It may seem complicated and frustrating at first, but over time you’ll start to get the hang of it and, hopefully, you’ll enjoy it.
You can use the brew search command followed by a word to search for that term. Let’s have a go at searching for a web browser:
brew search firefox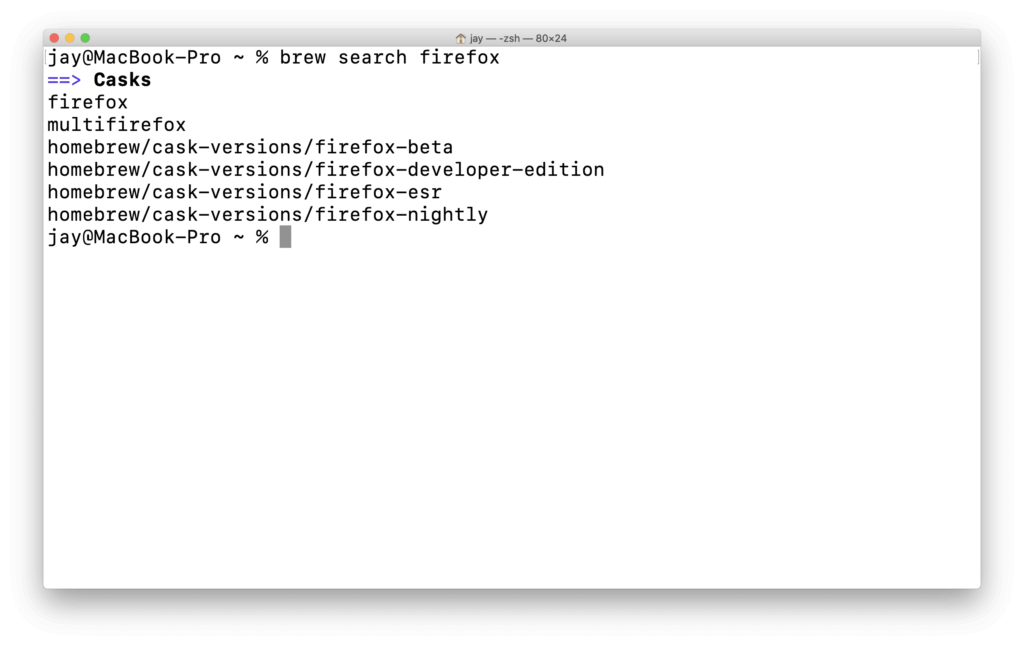
The result will look like this (or something similar).
All the relevant results are now displayed. The official Firefox browser is available as firefox, whilst firefox-developer-edition and firefox-beta provide the corresponding pre-release versions.
Search online with formulae.brew.sh
At https://formulae.brew.sh, you can search for packages online and view some further information about them.
Let’s have a look at Firefox here then.
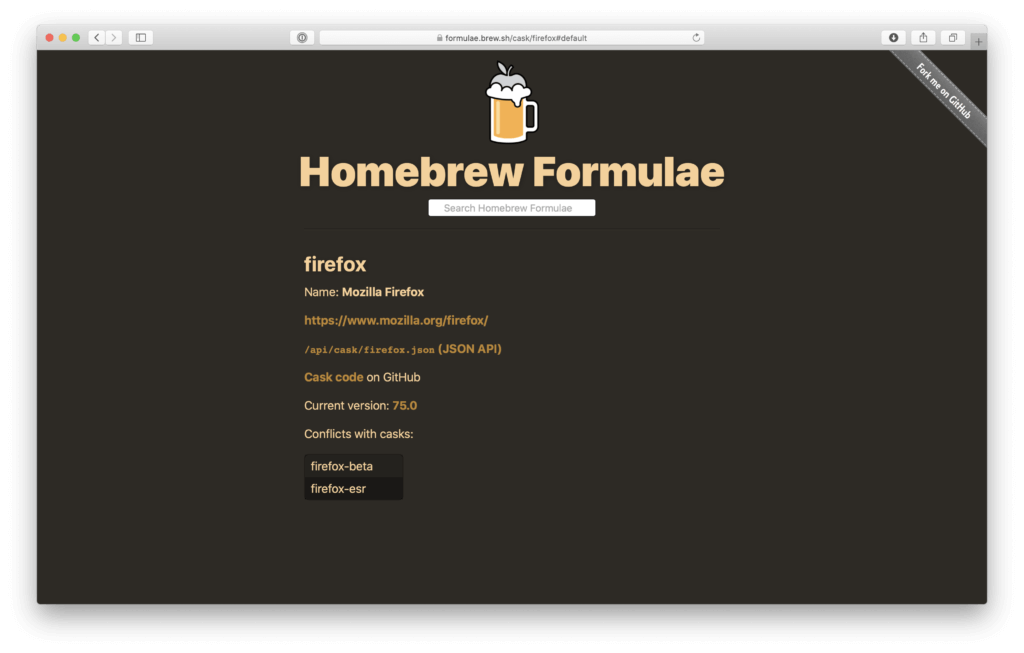
Further information is available in a concise summary on the Homebrew Formulae website.
We can find the official name, a link to the package’s website and, under the heading Cask code on GitHub, the most interesting part: a fully transparent explanation of the process by which a package is installed.
A few words on safety
Using brew means you bypass the official download from mozilla.org. So, in theory, you might end up installing something that’s called firefox but isn’t actually Mozilla Firefox at all. If you’re unsure, you can simply check the link provided above to see where the files come from.
In the case of Firefox, you can easily see here that the package is being downloaded from cdn.mozilla.net. This is the official source.
Casks are checked and authorised manually, so it doesn’t take more than one pair of eyes failing to spot something for malware to be introduced, assuming the source used is official and securely maintained.
Install package
Now let’s go back to our terminal and install the Firefox browser. You can do this using the command brew cask install:
brew cask install firefox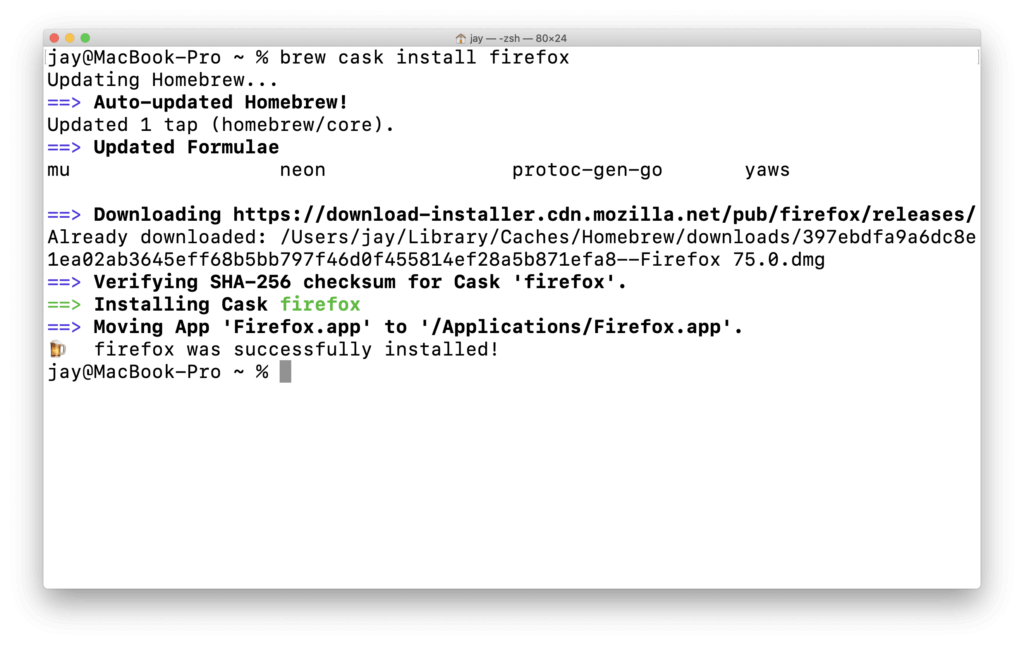
It’s clear to see here: Brew updates the list of available updates every time you run an installation. The necessary files are then downloaded (this wasn’t necessary in my case, as I’d already done this earlier to check that everything was working properly). So if you’re installing larger items, this can certainly take a few minutes, especially if you’re using a mobile connection whilst on the move.
Give it a go
Firefox is installed and can be found in the Applications folder on your Mac, just as you’d expect.
Conclusion
Today you learnt:
- Two different ways to find programmes: quickly via the terminal, or in a beginner-friendly way via the website
- Checked the installation path of a package
- Installing packages
Let me know what you think of this series of articles and whether you found the guide helpful. I’d love to hear your comments.